How to use Clarity Live Extension?
Welcome to Clarity Live!
With our new extension, get instant heatmaps right on your live site and watch recent session recordings for any page you're on. This extension adds the Clarity widget to any page with an installed Clarity tracking code. Ensure you have an active Clarity project with the code installed. Learn how to set up Clarity.
Start using the extension
Step 1
Sign in to Clarity by opening the Clarity extension from Chrome or Microsoft Edge extension.

The widget provides quick links to view:
- Heatmaps
- Recordings

Step 2
Show Clarity widget
To start using the Clarity Live extension, go to Live view tab and turn on the Clarity widget. Clarity widget contains the View heatmap, View area map, and View recordings icons.
Note
- The widget is available for all the pages of your site with Clarity tracking code installed on it.
- You can view this page on Clarity to view more recordings and heatmaps with applied visited URL and timeframe filter.

View Heatmap
A Heatmap (or Heat map) is a visualization tool that makes it easy to analyze aggregated information about how users interact with the website.
Two Heatmaps, one view
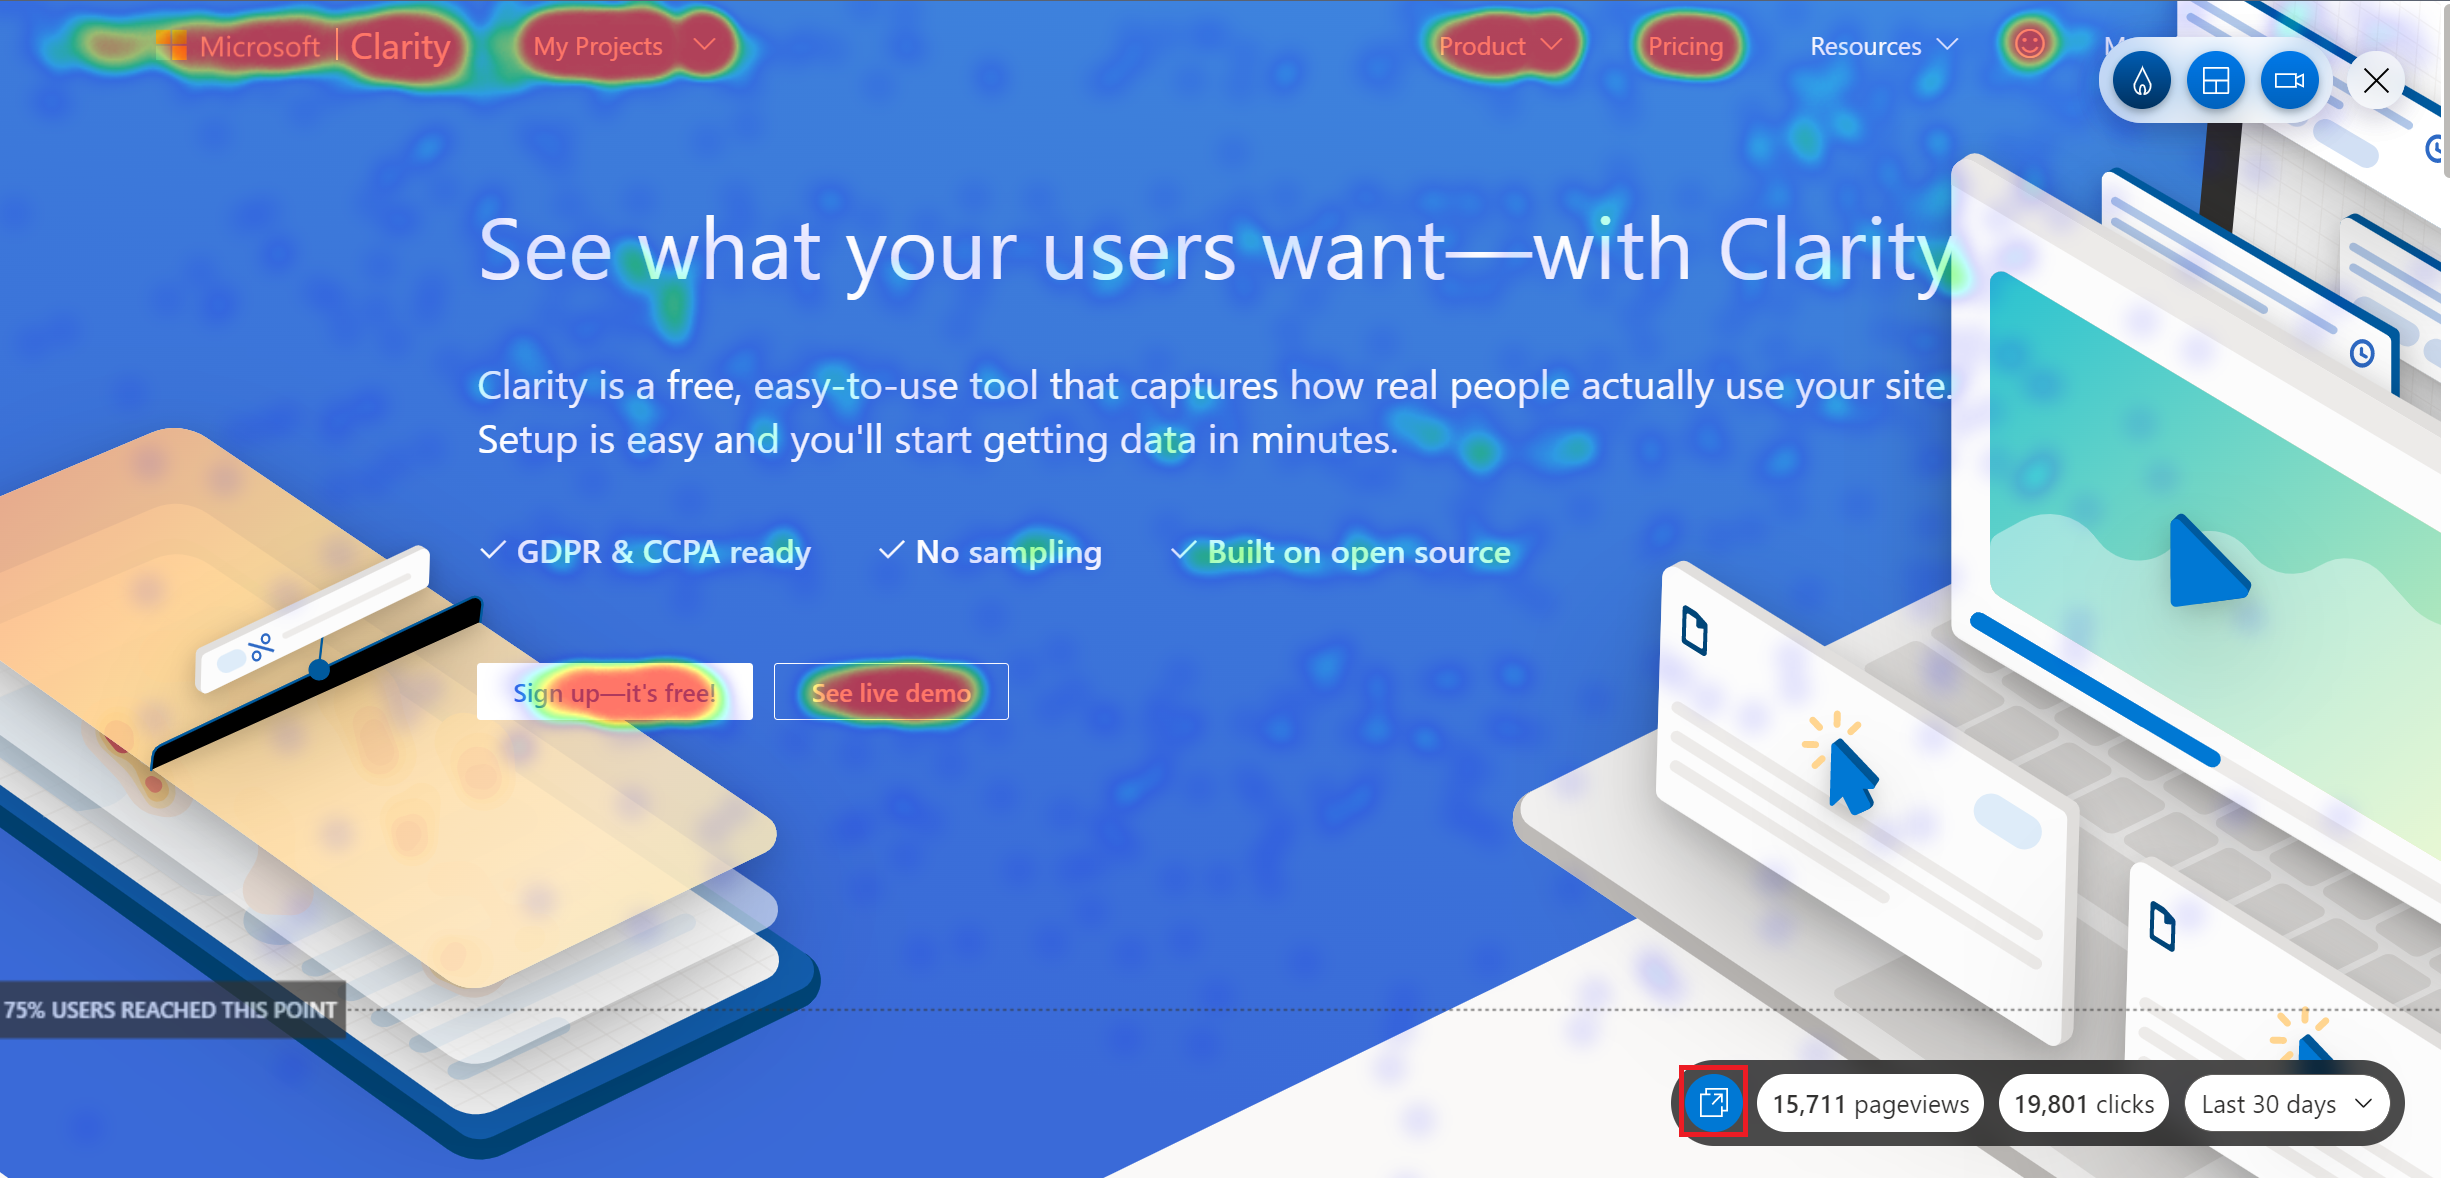
Clarity Live combines two types of heatmap into one view. No need to toggle between them anymore. Click heatmaps capture the most clicked (or tapped) elements on a page. Scroll heatmaps reveal the most viewed areas on a page by showing how far users scroll. Clarity tracks all visitor clicks and scrolls on mobile, desktop, and tablet and automatically generates a heat map faster than before.
Tip
Refer to Heatmaps to learn more.
Select the View heatmap icon to see where users clicked and how far they scrolled for a page on your site.
![]()
View Click map and Scroll map for the page with page views, number of clicks, percentage of scroll reach, and average fold. In addition, you can change the timeframe among 1 day, 3 days, 7 days, and 30 days in the bottom right.

Note
The click data isn't ranked by default.
Dynamic visualizations in a click
As you scroll through the page, you can notice the heat change dynamically. Clarity Live makes it easy to see engagement for fly outs, popups, dropdown lists, and other elements that can be difficult to capture in a typical heatmap experience.

To know more details on a Heatmap, select Go to Clarity icon in the bottom right.

Tip
Check out Click maps and Scroll maps to learn more.
View Area map
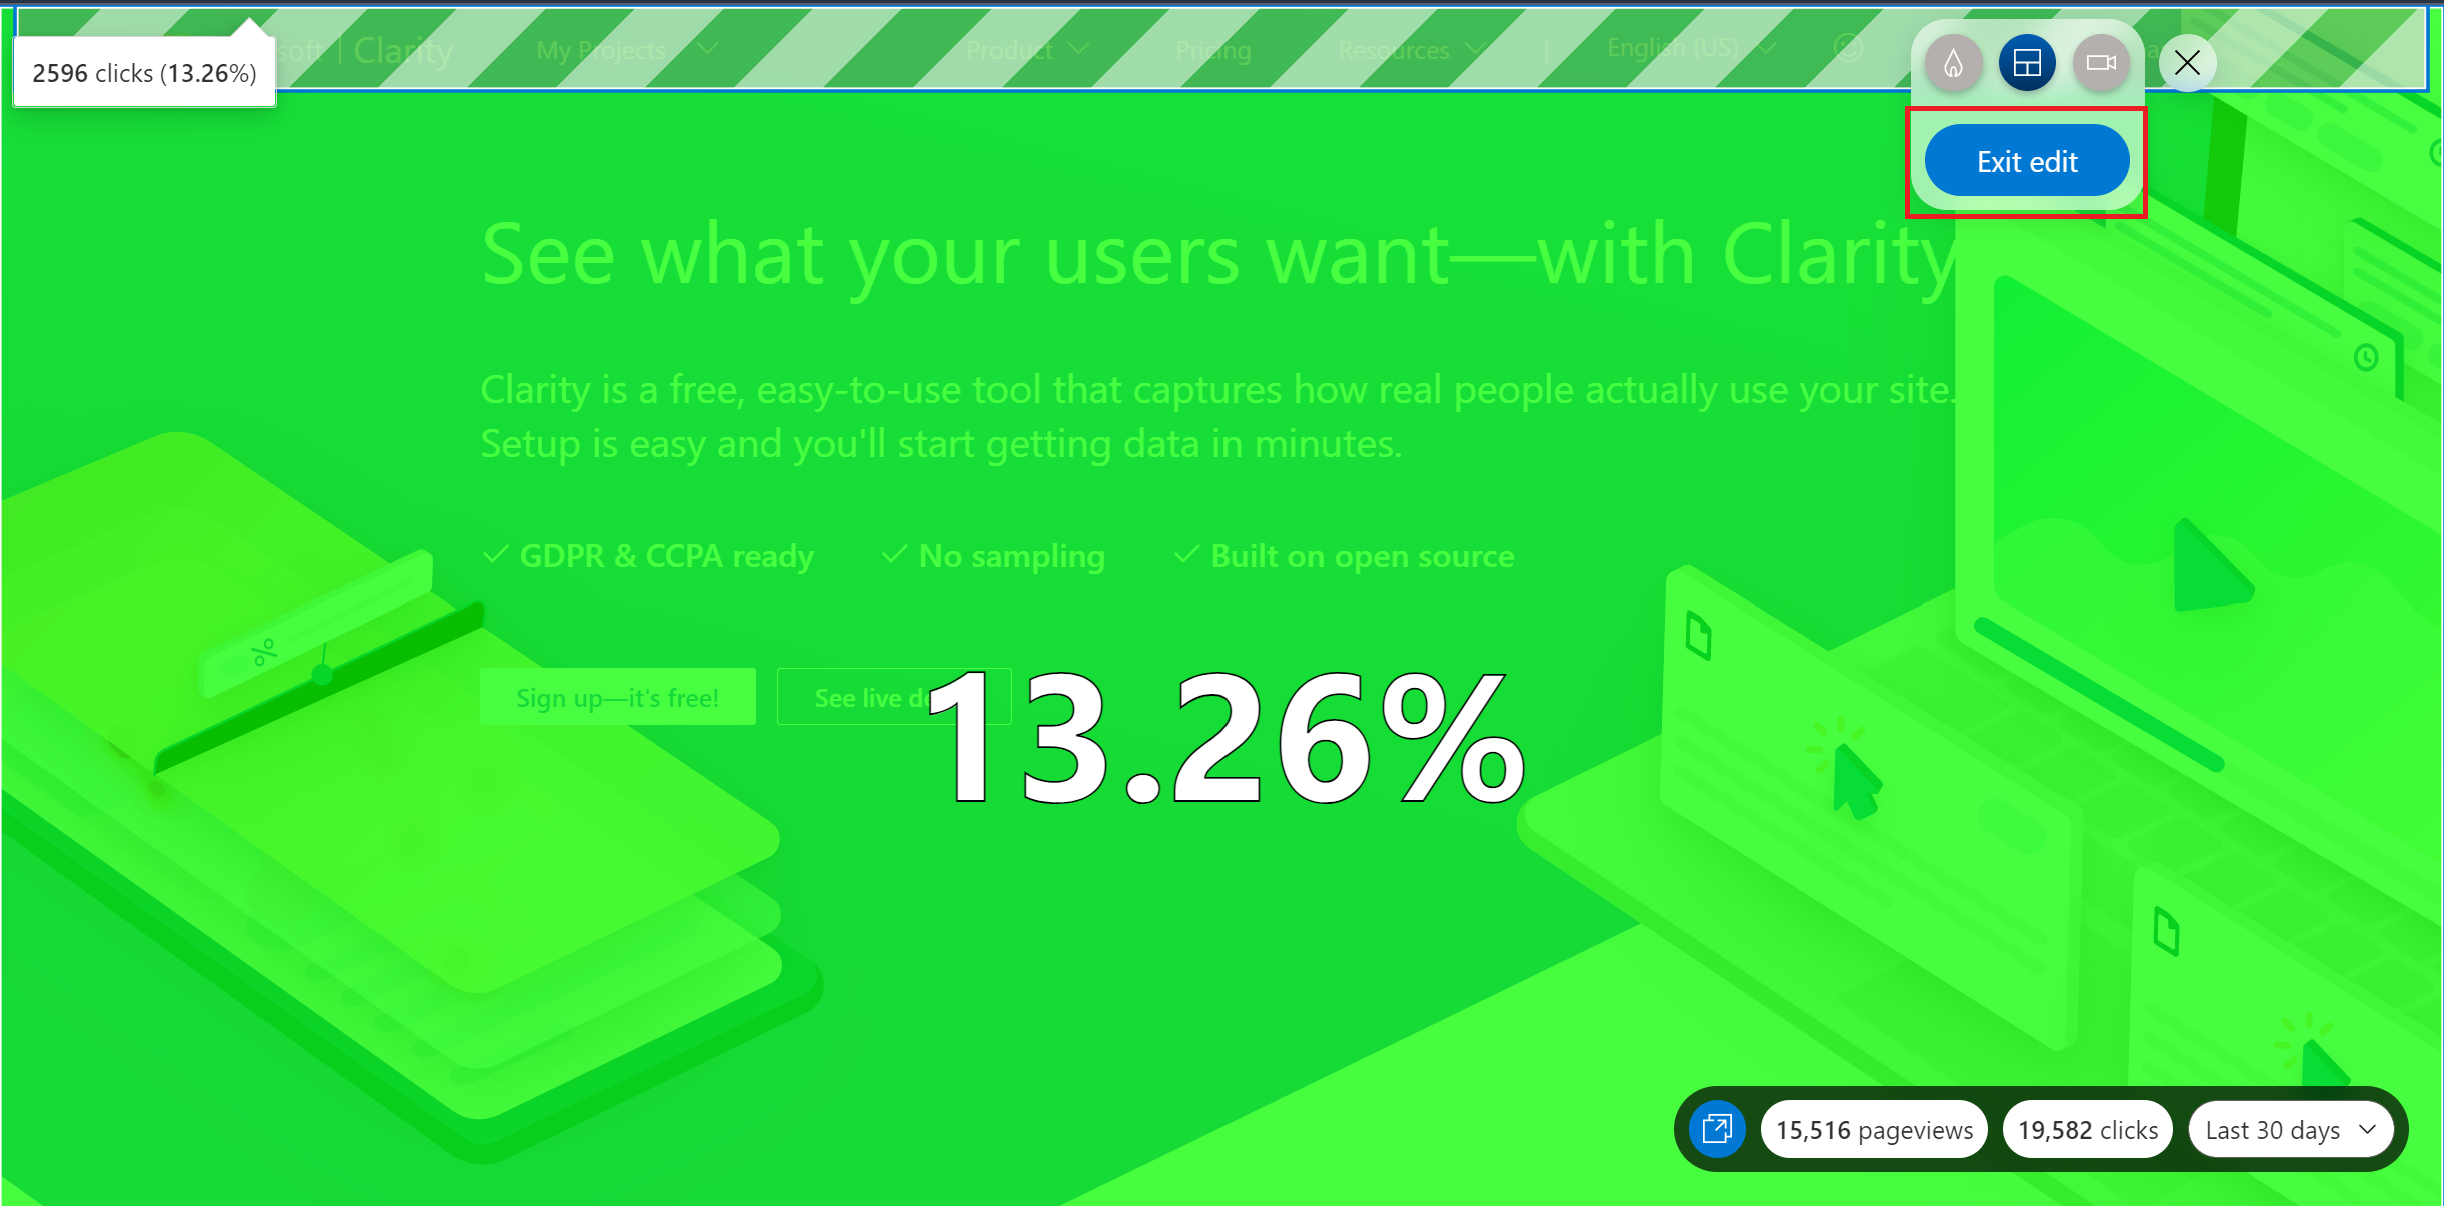
Clarity Area maps display the total clicks for all the elements within a selected area. Unlike a click map, you can choose the area and view the heat for all the elements within the area. Select the View area map icon to start viewing.
![]()
Heatmaps you can customize
Instead of visualizing engagement on the element level, the area maps allow you to select an area. The selected area could contain several elements such as total clicks and click distribution rate. In addition, view the page views and clicks. Change the timeframe among 1 day, 3 days, 7 days, and 30 days in the bottom right.

An area could include just one element or be as large as the entire page. Select Edit area to start selecting an area. Once you're done, Exit edit to view the total clicks and click distribution rate.

To know more details on an Area map, select Go to Clarity icon in the bottom right.

Tip
Refer to Area maps to learn more.
Limitations
- Dropdowns aren't editable areas. You can edit/select only persistent area. This means that you can select an area if it's dynamic even after moving out of the state. Examples of persistent areas include - navigation bar, image carousels, pop-up windows, etc.
- 'View heatmaps' and 'View recordings' icons aren't accessible in edit mode. To start using these features, select Exit edit.

View Recordings
Note
Clarity handles sensitive data with care. By default, sensitive content on the page is masked before upload. No sensitive text from the page is sent to the server.
Session recordings are a visual way to watch real user interaction on your site. They enable you to watch the entire user journey, see what your visitors love and where improvements can be made. Start viewing by selecting the View recordings icon.
![]()
These renderings capture an impression of the user exploration throughout your site by showing you where they clicked or tapped, where they hesitated, and how they moved their cursor. The inactivity is skipped, and you can also view the page clicks, device type, and location. Change the device type to view different recordings.

Recordings in near time
Clarity Live makes it a snap to find recordings for a specific experience. For example, if you want to see user engagement with a particular popup, fire the popup on your site, and select the recording icon on the widget. You would instantly see relevant recordings within the last three days.
Select area
Select any part of the page to see recordings for that area. You can select another area to compare the recordings.
To know more details of Recordings or to view the entire session recording, select the See more recordings icon.

Tip
Check out Recordings to learn more.
FAQ
For more answers, refer to Clarity Live Extension FAQ.