Add or remove table rows and columns in Pages on iPhone
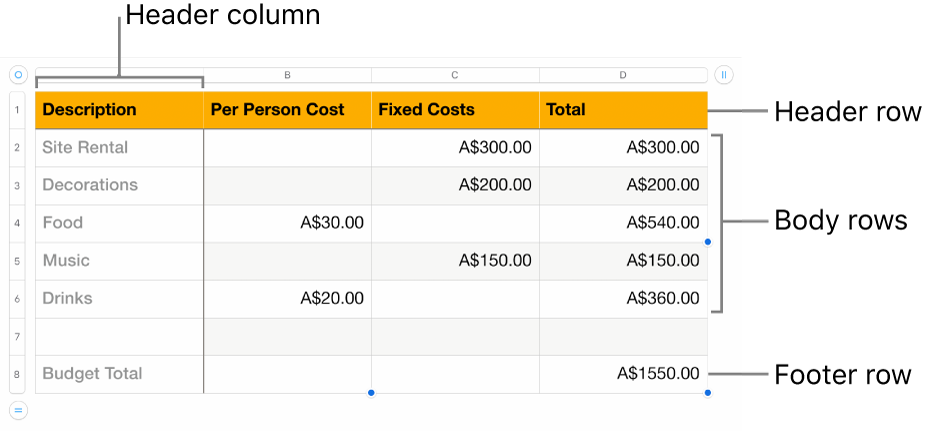
You can add, delete and rearrange rows and columns in a table. There are three types of rows and columns:
Body rows and columns contain the table data.
Header rows and columns (if any) appear at the top and left side of the table. They usually have a different background colour from the body rows and they’re typically used to identify what the row or column contains.
Footer rows (if any) appear at the bottom of a table and can have a different background colour from the body rows.

Note: The tasks below apply to a table you add to the page using the ![]() icon in the toolbar. They don’t apply to a page you formatted into columns.
icon in the toolbar. They don’t apply to a page you formatted into columns.
Add or remove table rows and columns
Go to the Pages app
 on your iPhone.
Open a document with a table, then tap the table.
Do any of the following:
Add or delete rows or columns at the edge of the table: Tap
 in the bottom-left corner of the table to add or delete rows. Tap
  in the top-right corner of the table to add or delete columns.
Change the number of rows or columns in the table: Select the table, tap
 , tap Table, then use
  next to Rows or Columns, or tap the number of rows or columns to enter a new value.
Insert or delete a row or column within the table: Tap the row number or column letter, then tap Insert or Delete.
You may not be able to delete a row or column if all its cells aren’t empty.
Add or remove header rows and columns
Adding header rows, header columns and footer rows converts existing rows and columns into headers or footers. For example, if you have data in the first row of a table and you add a header row, the first row is converted to a header row that contains the same data. Data in header cells isn’t used in calculations.
Go to the Pages app
 on your iPhone.
Open a document with a table, tap the table, tap
 , then tap Headers & Footer.
Tap
 next to a header or footer category.