Get started with Logic Remote on iPad
You use Logic Remote to remotely control many common functions in Logic Pro—playing and navigating projects, choosing patches and plug-ins, recording, mixing and automation. You can also use Touch Instruments to play software instruments in Logic Pro and create custom layouts for the key commands you use most often.
To show coaching tips with helpful information about the current view, tap the Settings button ![]() in the control bar, then tap Coaching Tips. You can continue to use all controls while coaching tips are visible.
in the control bar, then tap Coaching Tips. You can continue to use all controls while coaching tips are visible.
The first time you open Logic Remote, you’re prompted to connect to a Mac that’s running GarageBand, Logic Pro or MainStage.
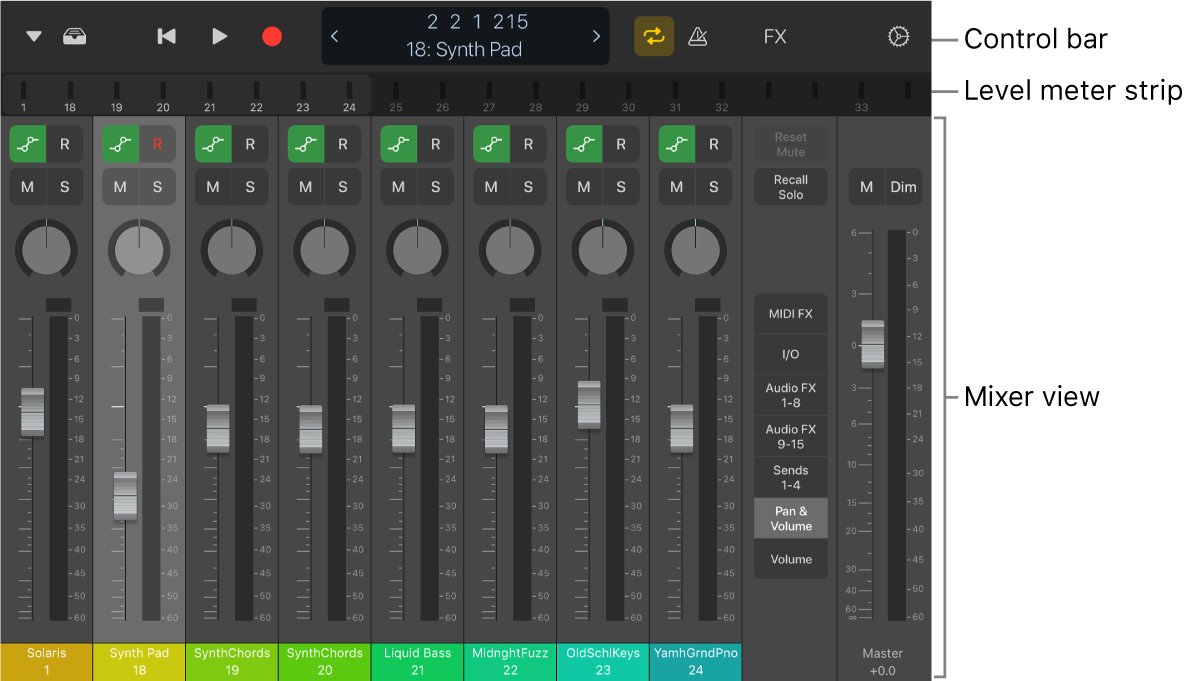
Logic Remote opens to the default Mixer view, where you can perform some basic mixing tasks. You can change the Mixer view to access additional controls.

The control bar located at the top of each screen features playback, navigation and recording controls. Below the control bar is the level meter strip, which shows track output levels during playback. You can use this strip to navigate between channel strips or you can replace it with the ruler, which contains the playhead, a cycle area and any markers existing in the project. You can switch between different views to play Touch Instruments, use Smart Controls, work with key commands or use Smart Help. You can also choose patches or plug-in settings in the Library.
Switch between applications controlled by Logic Remote
You can use Logic Remote to control Logic Pro, GarageBand or MainStage.
In Logic Remote, tap the Settings button
 in the control bar, then tap the name of the currently listed Mac.
In the connection dialogue that appears, tap the icon for Logic Pro, GarageBand or MainStage to control that application using Logic Remote.
Override the iPad sleep settings
In Logic Remote, tap the Settings button
 in the control bar.
If the Allow iPad to Sleep switch is turned on, tap it.
You might have to scroll down to see the setting.