Add and edit cell content in Keynote on Mac
You can add content to a table in several ways. You can type new content directly into cells or copy and paste content into cells from somewhere else. You can always edit or clear a cell after you add content to it.
Note: If you can’t add content to a table, make sure it’s unlocked. Click the table, then choose Arrange > Unlock (from the Arrange menu at the top of your screen).
Add content to cells
Go to the Keynote app
 on your Mac.
Open a presentation with a table, then do any of the following:
Add content to an empty cell: Click the cell, then start typing.
Paste paragraphs into a cell: Copy the paragraphs you want to paste, double-click the cell, then choose Edit > Paste (from the Edit menu at the top of the screen).
Edit content: Double-click the cell to make the insertion point appear, then type. To move the insertion point, click where you want it, then type.
Replace content: Click the cell, then start typing. The existing content is overwritten.
Delete all content: Click the cell, then press Delete on your keyboard.
See Format dates, currency and more to learn how to set specific data formats for cells.
You can also add an object and insert a link in table cells.
Wrap text to fit in a cell
If a cell isn’t wide enough to display all the text in the cell, you can wrap the text so it appears on multiple lines in the cell.
Go to the Keynote app
 on your Mac.
Open a presentation with a table, then do one of the following:
Wrap or unwrap text in a single cell: Click the table, Control-click the cell, then choose Wrap Text from the shortcut menu. A tick appears when wrapping is on. To unwrap text, deselect Wrap Text.
Wrap text for a row, column or the entire table: Select the row or column, or select the table. In the Format
 sidebar, click the Text tab, then click the Style button near the top of the sidebar. Select or deselect the “Wrap text in cell” tickbox.
Clear content from a range of cells
Go to the Keynote app
 on your Mac.
Open a presentation with a table, then select the cells you want to delete.
Do one of the following:
Remove the content but preserve the cells’ data format, text style and cell style: Press Delete.
Remove all data, formatting and styling: Choose Edit > Clear All (from the Edit menu at the top of your screen).
Autofill cells
You can quickly fill cells, or a row or column, with the same formula, data or a logical sequence of data — for example, a series of numbers, letters or dates.
Go to the Keynote app
 on your Mac.
Open a presentation with a table, then do any of the following:
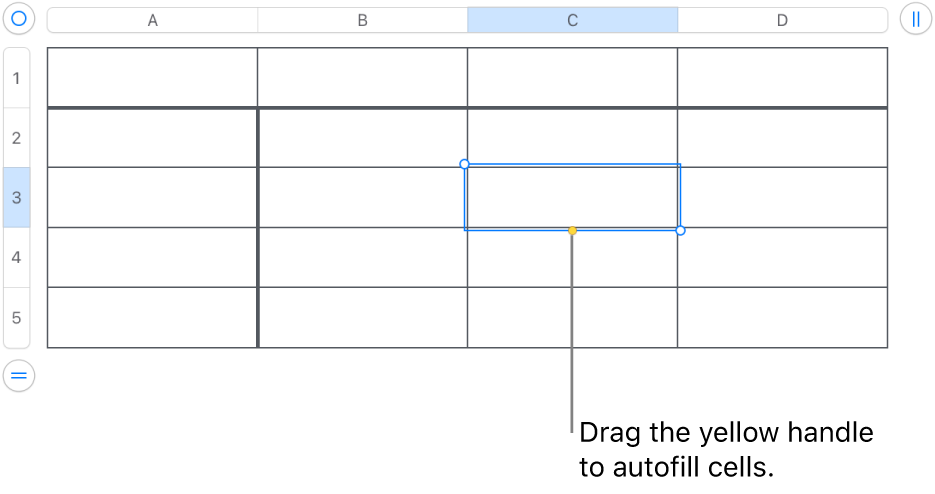
Autofill one or more cells with content from adjacent cells: Select the cells with the content you want to copy, then move the pointer over a border of the selection until a yellow autofill handle (a dot) appears. Drag the handle over the cells where you want to add the content.

Any data, cell format, formula or fill associated with the selected cells is added, but comments aren’t. Autofilling overwrites existing data with the content you’re adding.
Autofill cells with sequential content or patterns from adjacent cells: Type the first two items of the series in the first two body cells (not header or footer cells) of the row or column you want to fill; for example, type A and B. Select these cells, move the pointer over a border of the selection until a yellow autofill handle (a dot) appears, then drag the handle over the cells you want to fill.
You can also autofill cells using a pattern of values. For example, if two selected cells contain 1 and 4, the values 7 and 10 are added when you drag over the adjacent two cells (values are incremented by 3).
Autofilling doesn’t set up an ongoing relationship between cells in the group. After autofilling, you can change the cells independently of each other.
When you autofill cells, any formulas that refer to those cells are updated automatically to use the new value.
Add an object to a cell
You can paste images, shapes, lines, charts and equations into table cells. When you paste an object into a cell, it’s added as an image fill (background) in the cell. You can change how the object fills the cell, or add text that appears in front of the object.
Note: If you paste a shape that contains text, only the text is pasted into the cell.
Go to the Keynote app
 on your Mac.
Select an object in your presentation (or in another document), then choose Edit > Cut or Edit > Copy (cut removes it from its original location).
Click the cell where you want to add the object (it can be a cell that already has text).
Choose Edit > Paste.
By default, Keynote scales the object to fit in the cell. To change the object’s size, in the Format
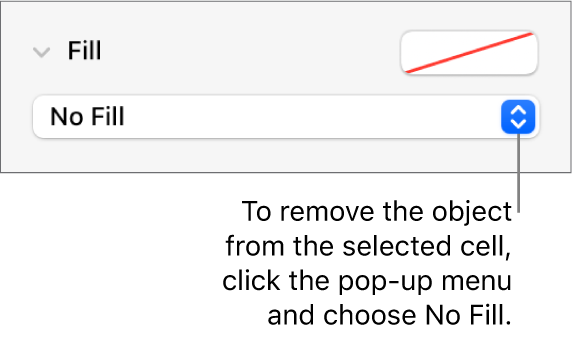
 sidebar, click the Cell tab, click the disclosure arrow next to Fill, then click the “Scale to Fit” pop-up menu and choose another option.
Delete an object from a cell
If a cell contains both text and an object, you can delete the object without deleting the text.
Go to the Keynote app
 on your Mac.
Open a presentation with a table, click the cell, then in the Format
 sidebar, click the Cell tab.
Click the disclosure arrow next to Fill.
Click the Image Fill pop-up menu and choose No Fill.

Show a cell’s row and column
You can temporarily highlight a cell’s row and column in blue as you move the pointer over a table. In a large table, this can help you identify column and row references for specific cells.
Go to the Keynote app
 on your Mac.
Open a presentation with a table, then hold down the Option key while you move the pointer over a cell.
Copy or move cells
When you copy a cell, or move a cell’s data to a new location in the table, all the cell’s properties are also copied, including its data format, fill, border and comments.
Go to the Keynote app
 on your Mac.
Open a presentation with a table, then select the cells you want to copy or move.
Do one of the following:
Move the data: After selecting the cells, click and hold the selection until the cells appear to rise off the table, then drag them to another location in the table. Existing data is replaced by the new data.
Paste and overwrite existing content: Choose Edit > Copy (from the Edit menu at the top of your screen). Select the top-left cell where you want to paste the data (or select an area of the same dimensions as the cells you’re pasting), then choose Edit > Paste.
If your data range contains formulas, but you want to paste only the results, choose Paste Formula Results.
Paste a cell style: Choose Format > Copy Style (from the Format menu at the top of your screen), select the cells where you want to paste the style, then choose Format > Paste Style.
Paste cell contents without the style: Choose Edit > Copy, select the cells where you want to paste, then choose Edit > Paste and Match Style. The pasted cells adopt the formatting of the new location.
Paste outside an existing table to create a new table: Select the cells, then drag them where you want them. A new table is created with the pasted cells.
If you copy a range of cells that include hidden data (either hidden or filtered), the hidden data is also copied. If you paste to a range of cells with a matching arrangement of hidden cells, the hidden data is also pasted. Otherwise, the hidden content isn’t pasted.