Relink clips to media files in Final Cut Pro for Mac
In Final Cut Pro, clips represent your media, but they are not the media files themselves (see Media files and clips in Final Cut Pro for Mac). Final Cut Pro keeps track of the links between clips and media files automatically.
However, there are times when you need to manually relink clips to media files:
When files are altered or re-created outside of your copy of Final Cut Pro: For example, if you send files out for color correction, you may need to relink the clips in your event to the color-corrected versions of the files when you receive them.
When media files are missing: If you move or rename externally linked files in the Finder, or if you move an event or a project to a different location, you need to relink the event or project clips (which appear as red frames with yellow alert triangles) to the files.
In either case, manually relinking connects the clips in Final Cut Pro to the correct files on your Mac or storage device.
You can relink either original source media files or proxy files. The relinked files must include all the media in the referenced clips and must be the same media type (for example, video or audio), have the same frame rate, and have similar audio channels.
Note: You can’t undo the Relink Files command.
In Final Cut Pro, do one of the following:
In the browser or the timeline, select the clips you want to relink.
In the browser, select the projects containing the clips you want to relink.
In the Libraries sidebar, select an event or an entire library containing the clips you want to relink.
Do one of the following:
Relink original source media files: Choose File > Relink Files > Original Media.
Relink proxy files: Choose File > Relink Files > Proxy Media.
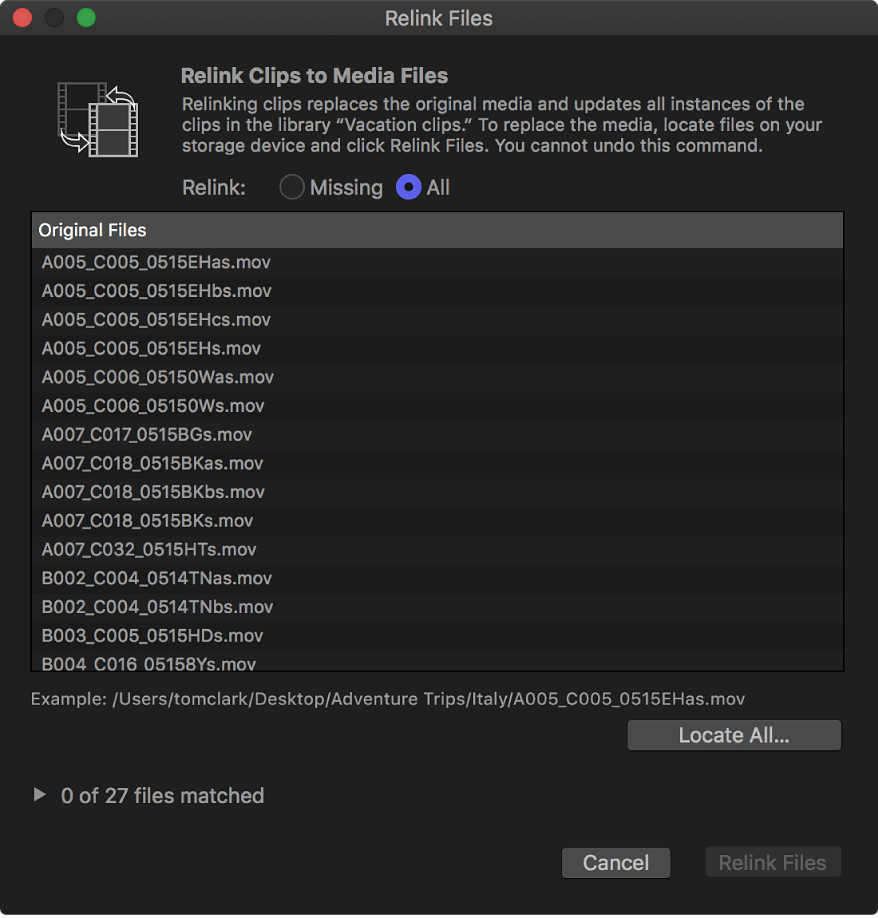
The Relink Files window appears. By default, this window shows missing clips or events only.
If you want to show all items in the selection, select All.

Do one of the following:
Locate all the matching files: Click Locate All.
Locate some of the matching files: Select items in the list and click Locate Selected.
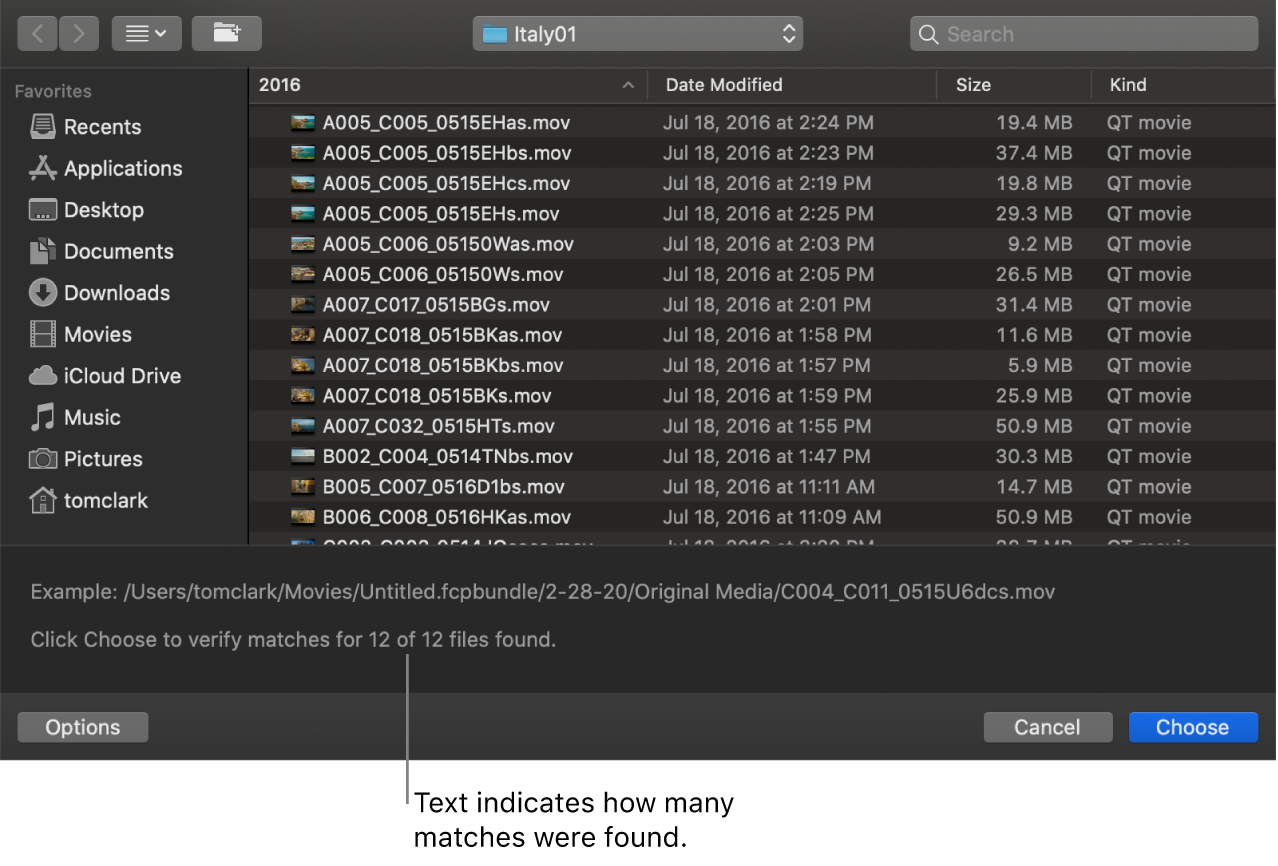
In the window that appears, navigate to one of the files you want to link to, or to the folder that contains it.
Text at the bottom of the window indicates how many potential matches to items in your original list were found (based on the filenames only).

Note: Final Cut Pro identifies matches based on proximity in the directory structure and related filenames. For example, if your original files were in two adjacent folders, Final Cut Pro looks in folders adjacent to the folder containing the file you chose and relinks all matching files in the relative path. If your original files were named “File1,” “File2,” “File3,” and so on, and you chose to relink to a file named “File1_A,” Final Cut Pro looks for files named “File2_A,” “File3_A,” and so on to relink the remaining items in your list.
Click Choose.
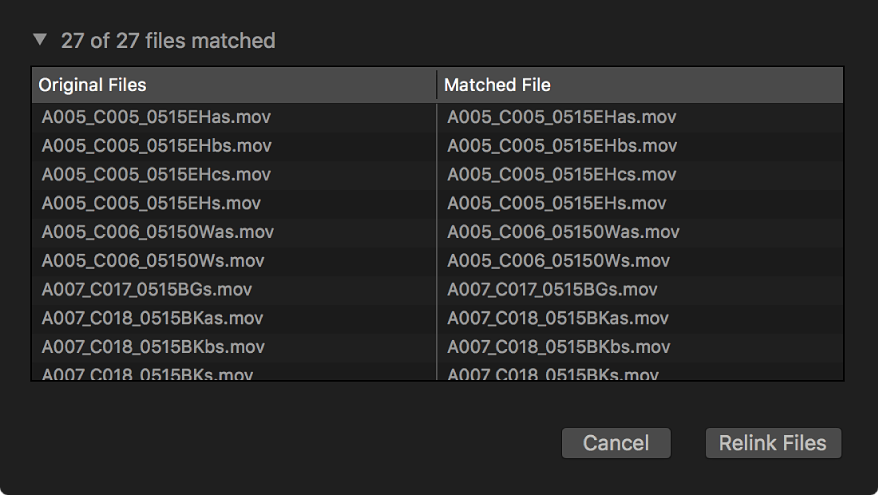
Final Cut Pro analyzes the files to confirm that all attributes (in addition to the filename) match items in the original selection. Analysis results are shown below the Original Files list (for example, “3 of 3 files matched”).
Click the disclosure triangle next to the analysis results to show a list, with old files on the left and new, matching files on the right.

If a file was matched incorrectly, select it in the list and press Delete. The item is placed back in the original list at the top of the Relink Files window.
Items with no matches remain in the original list above. To continue to locate matches, select items in the original list and repeat steps 4 through 6.
To link the event clips to the new media files, click Relink Files.
All matched clips (including those in other projects or events) are updated to link to the new media files. Metadata in the relinked clips remains unchanged.
Note: Red “Missing Proxy File” alert icons in the browser, viewer, or timeline may indicate an unrelated issue. You may need to switch the playback media mode or generate proxy media. See Control playback quality in Final Cut Pro for Mac or Create optimized and proxy files in Final Cut Pro for Mac.
Download this guide: PDF