修改此控制項目會使頁面自動更新
Final Cut Pro X User Guide
- Welcome
-
- What’s new in Final Cut Pro 10.4.7
- What’s new in Final Cut Pro 10.4.6
- What’s new in Final Cut Pro 10.4.4
- What’s new in Final Cut Pro 10.4.1
- What’s new in Final Cut Pro 10.4
- What’s new in Final Cut Pro 10.3
- What’s new in Final Cut Pro 10.2
- What’s new in Final Cut Pro 10.1.2
- What’s new in Final Cut Pro 10.1
- What’s new in Final Cut Pro 10.0.6
- What’s new in Final Cut Pro 10.0.3
- What’s new in Final Cut Pro 10.0.1
-
- Intro to effects
-
- Intro to transitions
- How transitions are created
- Set the default transition
- Add transitions
- Delete transitions
- Adjust transitions in the timeline
- Adjust transitions in the inspector and viewer
- Merge jump cuts with the Flow transition
- Adjust transitions with multiple images
- Modify transitions in Motion
-
- Add storylines
- Use the precision editor
- Conform frame sizes and rates
- Use XML to transfer projects
-
- Glossary
- Copyright

Speed up a clip with jump cuts in Final Cut Pro
To compress time in a long clip without playing the clip at fast speed, you can create jump cuts to periodically skip over a specific number of frames. For example, if you have a 10-second shot of a person walking down a hallway, rather than playing the entire 10 seconds, you can create jump cuts every 2 seconds that skip 30 frames each, so the action happens in a fraction of the time.
In the Final Cut Pro timeline, select the clip that you want to speed up, then add a marker at each frame where you want a jump cut to occur.

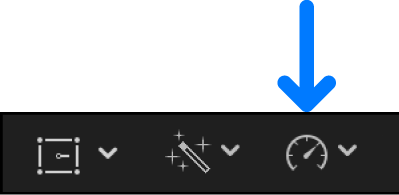
Click the Retime pop-up menu below the viewer and choose Jump Cut at Markers, then choose a number of frames from the submenu.

You can skip 3, 5, 10, 20, or 30 frames.

感謝您的寶貴意見。