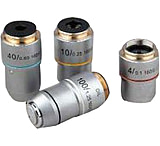
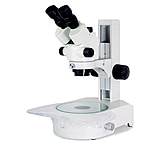
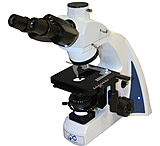
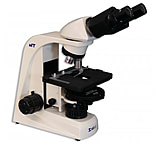
When you get your first microscope, you’re probably excited to start fiddling with the eyepiece, magnification, and other components so that you can start examining specimens. However, if you’ve never used a microscope before, there is a bit of a learning curve. From gathering the right lab equipment, microscope accessories, and microscope parts to preparing your microscope slide, tuning your settings, and cleaning the objective lens, it takes some time to get ready. To help you have fun and learn more about your microscope, we put together this helpful step-by-step guide for you to follow.![]()
Step 1: Set Up the Microscope
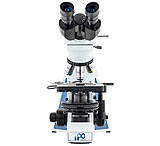
Before you do anything, read the manual that came with the microscope. This lets you learn about the individual parts and familiarize yourself with the different knobs, magnification settings, and objective lenses. After this, you’ll need to move the microscope to your viewing station. Carry it with both hands, keeping on hand underneath to support it. Place your other hand on the other arm to stabilize it. The biggest reason people need to replace microscopes is because they break when dropped, not because they wear out.
Step 2: Clean the Lens
To ensure you get a clear image, clean the microscope lenses carefully. Never touch any of them with your fingers, as this leaves hard-to-clean oils and particles that obscure the image. Instead, gently use a lens tissue, lens cloth, or lens pen. Avoid using a shirt or towel, as these objects are rough and can scratch the glass.
Step 3: Prepare a Slide
Preparing a slide is what allows you to see organisms and other small bits of matter. While you can purchase a prepared slide and skip this step, it’s helpful to learn how to prepare one yourself. Below is an easy way to practice this.
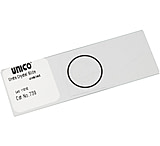
For your first prepared slide, find a magazine, newspaper, or other printed document with small print. Cut out one letter "e" as a test specimen and place it on a clear glass slide. Use a single drop of water to moisten it. Be careful not to use too much water. Next, place a cover slip, which is a small square of plastic, over the specimen. The cover slip secures the specimen and keeps the objective lens clean in case it touches the slide. Don't drop the cover slip straight down on the slide, as this traps bubbles. While bubbles are interesting under a microscope, they interfere with the specimen. To avoid this, place one edge of the cover slip on the slide and then tilt the other side of cover slip down and over. This type of prepared slide is called a wet mount and it is the basic mount used for nearly all specimens. You can follow the same process using pond water and other substances instead of a piece of print to see many interesting things.
Step 4: Insert the Slide
Place the slide on the stage of the microscope, and secure with the stage clips. While some beginners ignore the stage clips, this is not recommended. This is particularly useful at high magnification, as even a small amount of stickiness in your finger from oil on your skin will move the slide enough to lose the specimen when you let go. Using stage clips prevents this from happening, keeping your vision clear.
Step 5: Set Up for Viewing
Rotate the objective lenses on the nosepiece of the microscope until the shortest objective is over the slide. Make sure the lens clicks into place. The shortest objective lens is low power, and you always want to start with the low power objective. The low power lens gives the widest field of view, making it easier to find your specimen and center it when looking through the microscope. Trying to find the specimen with the high power objective lens without first centering it in the field of view at low power is nearly impossible.
Step 6: Set the Light Control
The light source can be either an iris or a diaphragm. If your microscope has an iris you need to open it. If it has a diaphragm (the circular plate under the stage with different size holes), rotate it until one of the large holes is centered under the slide. This is your light control. When you’re new to microscopy, it’s easiest to start with plenty of light. Once you have focused and found your specimen in the field of view, you can start reducing light until you see the most detail. The brightest setting is typically not the best for contrast and detail. In fact, when you start hunting for pond water organisms, you'll find that many of them avoid light. Use only as much light as you need.
Step 7: Focus the Microscope
Adjust the focus slowly. If you are going too fast, it is easy to focus past the correct point. If your microscope has two controls, use the coarse focus knob for low and medium power, and then switch to the fine focus knob as needed to gradually improve clarity. If you have the "e" or another specimen under the objective properly, it should now be visible. If it is not, gently move the slide around. This may take several tries.
Once you have everything in focus, compare the position of the specimen under the microscope with its position on the slide without the microscope. You’ll notice the microscope turns everything upside down and reverses everything from right to left. You’ll want to memorize this because you must move the slide in the opposite direction of where you want the specimen to go. For example, when you want the specimen to move to the right, move the slide to the left. If you want the specimen to move up, move the slide down. This seems strange at first, but gets easier with practice.
Step 8: Increase Magnification
Now for more magnification. Center your specimen in the middle of the field of view as best as you can. Rotate the medium-length objective lens over the slide until it clicks into place. As you slowly refocus the microscope, you will only see a part of another specimen. Move the slide slowly back and forth if you cannot see anything. If you get lost and lose the specimen, go back to low power, center the slide and try again. It may take several tries to find a specimen, but this is normal. Don't give up.
Step 9: Switch to High Power
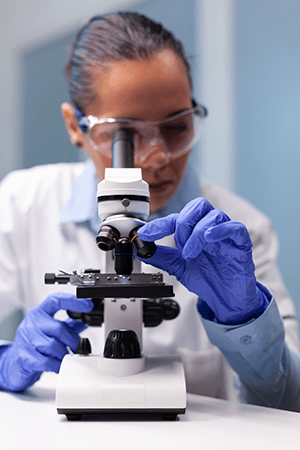 If you managed medium power and have the specimen focused and in the field of view, you can try high power. Once again, center the part of the specimen you want to look at in the field of view and slowly rotate the high power objective lens until it clicks into place. Since this is the longest tube, it will barely clear the slide, so be careful. Never use the coarse focus knob when using the high power lens. If your microscope has both fine and coarse focus, use only fine focus at high power. Since the objective is so close close to the slide, using the coarse focus can jam the objective into the slide and break it. Worse, yet, you may soil and damage the objective.
You will soon discover that using your first microscope at high power is more difficult to use than at low power. Don’t worry, it takes practice to get used to it! The good news is that you don't need to use high power lenses that often. Most specimens for amateur microscopy look better at low and medium power, anyway. Even scientists use low and medium powers for much of their work. Use only enough magnification as needed.
Shop Microscopes & Microscope Accessories Today!
Here at OpticsPlanet, we want to be your #1 destination for all the equipment and supplies you need! If you’re still shopping for your first microscope, browse our options from top brands, including Celestron, LW Scientific, and Meiji Techno. We also have tons of microscope accessories for sale, as well as replacement microscope parts in case anything breaks. For more comprehensive laboratory needs, check out our laboratory consumables, laboratory glassware, and laboratory storage.


